TUTORIAL – Write a Bare Metal “OS” for Raspberry PI Zero (C , ASM)
The concept behind this is called Bare Metal, and it’s not really an OS; it’s a C program running directly on the CPU.
The following is quiet advanced, and suitable to people familiar with Linux, Electronics, Raspberry PI, Programming, and a rather broad computer sciences knowledge will not be too much in this case.
Now why would one write an OS while there are many distro available ?
- RT linux kernel on the PI-zero was not that impressive in term of performances
- it is supposedly running super fast.
- you learn the architecture of the BCM2835 ARM processor and it’s peripherals.
- you learn C and a bit of Assembly programming
- it’s fun !
Now some things to take into considerations are :
- no drivers !!
- C does not have basic stuffs like stdlib. (wait there is a solution for this, don’t worry)
- did I mention no drivers ?
If you need drivers and a minimal kernel, you should rather check Linux from scratch instead and make your own Bare Metal “OS”.
So, let’s get to it; we will need:
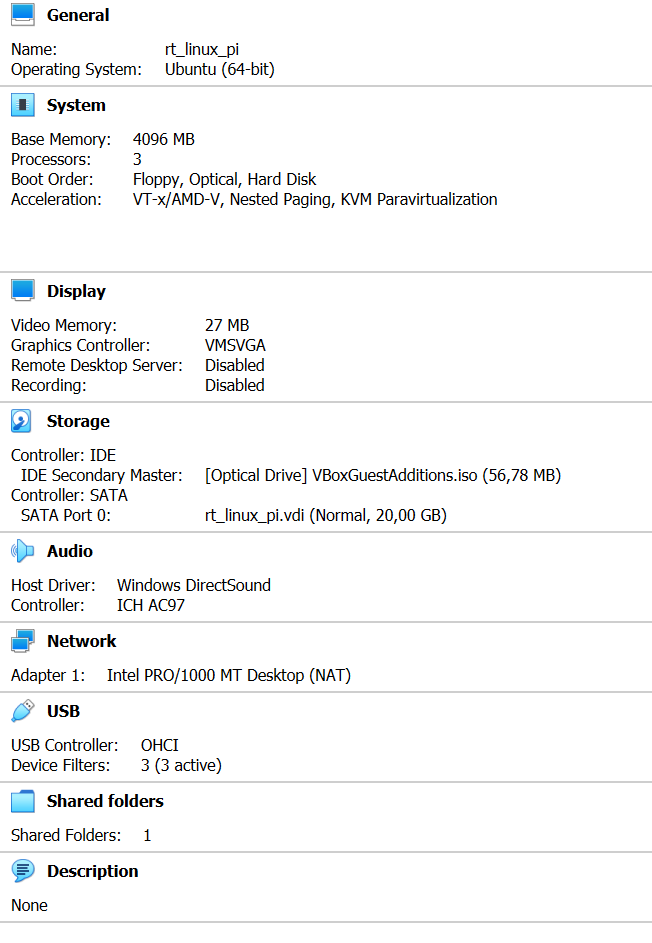
An Ubuntu machine. I use Virtual Box 6.1.2 and Ubuntu 20.04 (5.4.0-42-generic)
One should install these building tools for ARM:
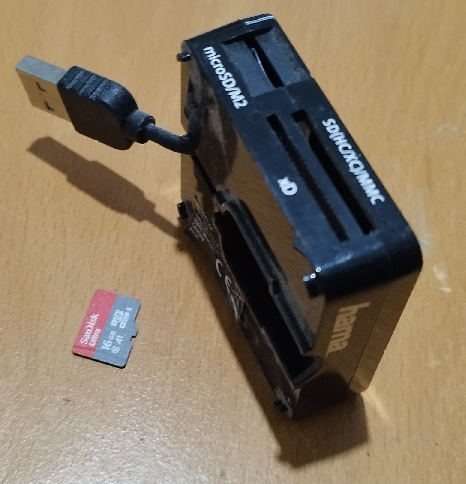
apt-get install gcc-arm-linux-gnueabi binutils-arm-linux-gnueabiA micro SD card and A USB card reader (shared in virtual box)
Format it as FAT32; 1GB should suffice.
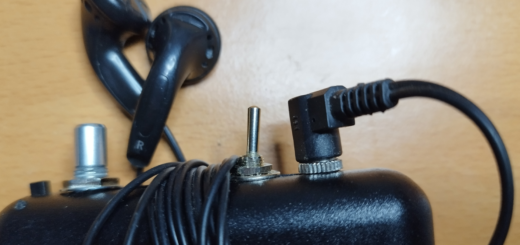
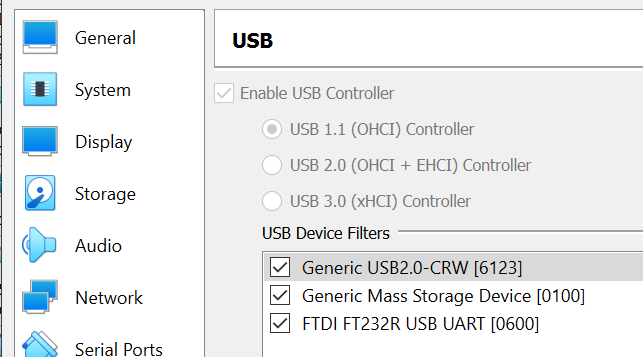
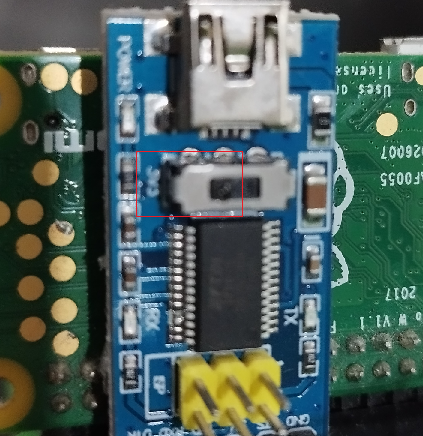
An FTDI serial board
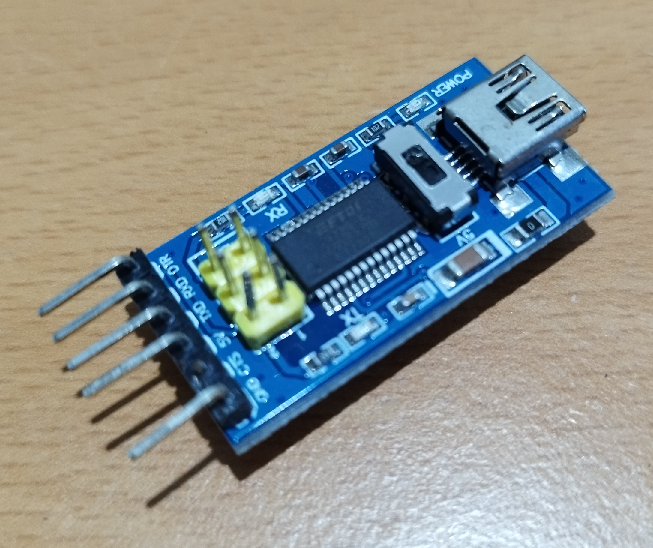
… to communicate through the serial port of the raspberry pi zero; here we can see the µSD card and the FTDI settings
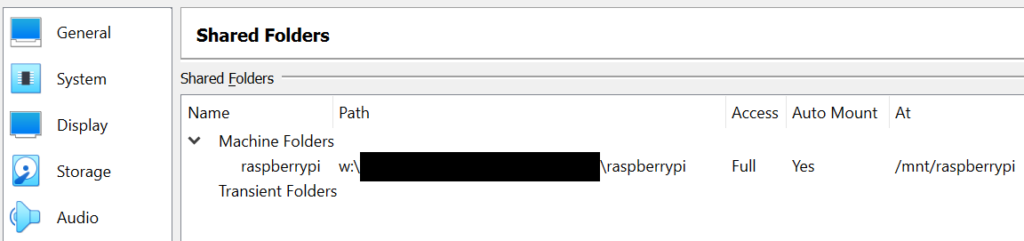
Shared folders to backup our work (optional)
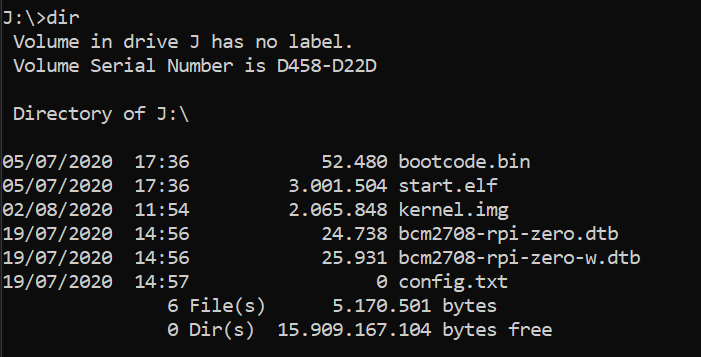
This is what the SD card content will look like under windows.
The C program will be compiled and linked into an .img file (kernel.img).
An example of prebuilt kernel can be found here (from David Welch).
https://github.com/dwelch67/raspberrypi-zero.
The other files can be found on this repo:
https://github.com/raspberrypi
So, copy bootcode.bin and start.elf to the sdcard. (To test your pipeline first, you can also copy kernel.img)
The provided kernel image code is in the heartbeat directory, so if you stick the µSD card in your PI zero and turn it on, leds should blink.
the led nearest that corner should blink in a heartbeat like manner, two blinks, pause, two blinks, pause…
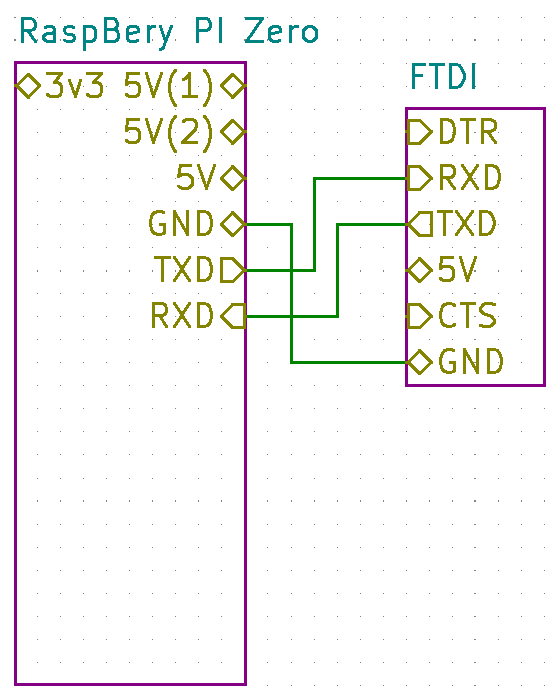
Schematic
Here is how to connect the FTDI board to the PI Zero. (power comes from USB mini cable so no need to grab it from RPI)
Don’t forget to set the FTDI board to 3V !!
 |  |
The FTDI programming board allows to send a temporary firmware in the RPI zero, and as a second stage, to communicate with the RPI with the FTDI acting as a tty device.
Once your kernel version is ready for “release”, you can build the .img file and put it on the sd card.
The FTDI allows you to avoid to power off the RPI every time.
RPI Zero bootup up sequence
Apparently RPI uses the GPU to load the boat sequence
- the GPU runs bootcode.bin
- bootcode.bin initializes the system and runs start.elf
- start.elf (firmware) initializes too then runs our kernel.img on the ARM CPU
Some assembly language is built and its binary counterpart is loaded and used as a bootstrap at address 0x8000.
The mov sp,0x8000 opcode changes the stack pointer to 0x8000 address and then the CPU jumps to the notmain C entry point.
.globl _start
_start:
    mov sp,#0x8000
    bl notmain
hang: b hang

.globl PUT32
PUT32:
    str r1,[r0]
    bx lr

.globl GET32
GET32:
    ldr r0,[r0]
    bx lr
Build/Run the code
As the target is an ARM processor, building it from an Ubuntu VM (x86-64 processors) is not the way to go.
The development tools contain a compiler, and other helper applications. Here is an example of building a notmain.c without make files.
arm-none-eabi-as --warn --fatal-warnings vectors.s -o vectors.o
arm-none-eabi-gcc -Wall -Werror -O2 -nostdlib -nostartfiles -ffreestanding -c notmain.c -o notmain.o
arm-none-eabi-ld vectors.o notmain.o -T memmap -o notmain.elf
arm-none-eabi-objdump -D notmain.elf > notmain.list
arm-none-eabi-objcopy notmain.elf -O binary kernel.img
Using the bootloader to test the C code as a new kernel:
I use a complex Makefile as my projects involes many .c files; Then a shell script that cleans and make the whole project.
Then it communicates through /dev/ttyUSB0 via the FTDI dev board to dump the notmain.srec file in the RPI Zero.
Here is the shell script code (you’re welcome) :
#!/bin/bash
make clean && make

echo "g\n" >> notmain.srec

echo -e "\nPRESS RESET !!!\n"
echo -e "\nPRESS RESET !!!\n"
echo -e "\nPRESS RESET !!!\n"

stty -F /dev/ttyUSB0 115200
exec 9<>/dev/ttyUSB0
read answer <&9 ; echo "$answer"
read answer <&9 ; echo "$answer"
read answer <&9 ; echo "$answer"
read answer <&9 ; echo "$answer"
cat notmain.srec >&9

while true; do
  read answer <&9 ; echo "$answer"
done

exec 9>&-

read -n 1 -p"pause"
Disassembling/Checking the produced code
The C code is being compiled and all objects linked together. Then notmain.elf file is created before the kernel.img.
One can disassemble it using:
arm-none-eabi-objump -D notmain.elf | more
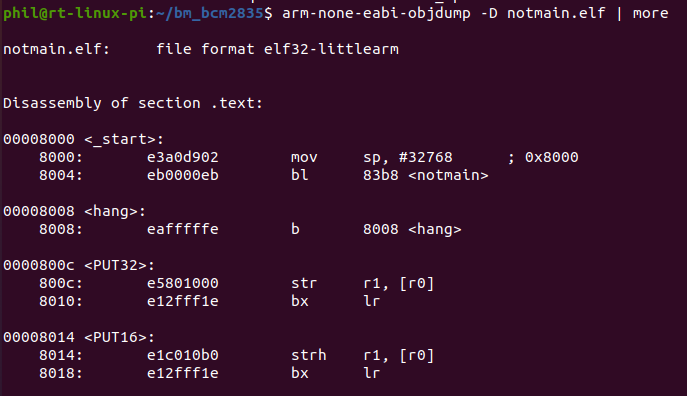
One can see the ASM code with the bootstrap to our main program.
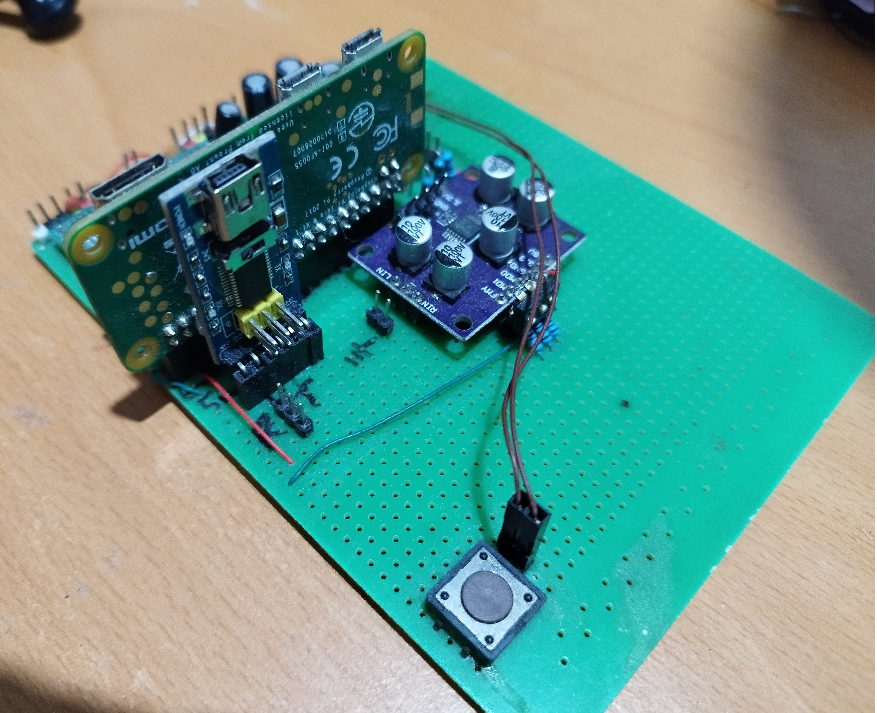
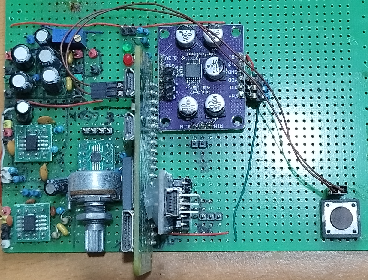
Further work
I will post C code I wrote, I still have to perfect it and debug it.
Here is my hardware setup. Yours does not need to be that complicated. I aim at communicating with I2S protocol to breakout boards.
Why? Because I can. (lol)
 |  |  |
Resources
https://github.com/dwelch67/raspberrypi
https://github.com/dwelch67/raspberrypi-zero
https://www.raspberrypi.com/documentation/computers/processors.html
https://forums.raspberrypi.com/viewtopic.php?f=72&t=72260
https://sourceware.org/newlib/